- Published on
Nuclear Devices - For the TV Series ARROW
- Author
-
-
- Name
- Posts
- Posts
-

Another multi-episode story-arc for the TV series ARROW. This time, involving NUKES!


Nuclear Trigger Device


Completed Assy
These two devices largely comprised of existing rental props from various sources that had been combined together with custom made subassemblies. This process yielded an expensive looking prop at a greatly reduced price.
Background
Building a realistic looking simulated nuclear device of any kind is an expensive proposition. Knowing this, the Prop Department at ARROW opted for procuring a rental devices and modifying them to suit the script requirements.
1st Device: the "Nuclear Trigger"
Depicted below, is the "seed-object" for the first build. This was a "Suitcase Nuke" selected from PROPOLOGY rental stock.
It featured a status panel with operational LED lighting effects, a nifty circuitry access cover (that was spring loaded to detach when pressed inward), and an operational LED countdown timer.
It featured a status panel with operational LED lighting effects, a nifty circuitry access cover (that was spring loaded to detach when pressed inward), and an operational LED countdown timer.
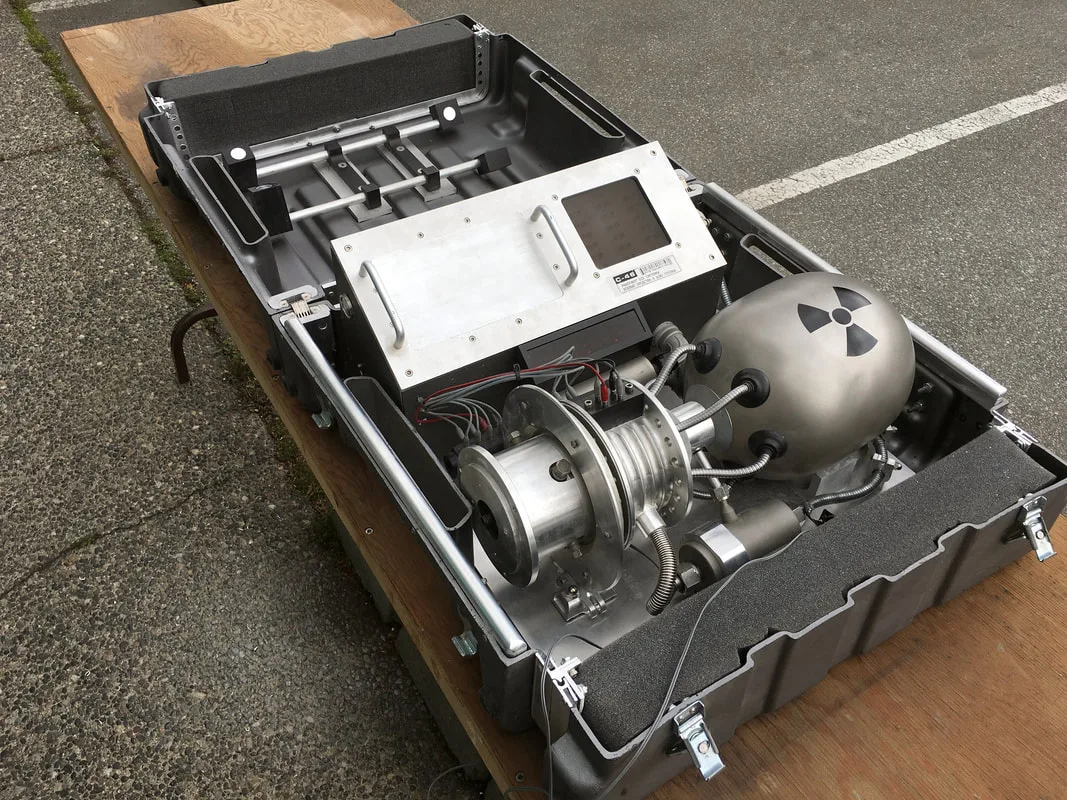

"Suitcase-Nuke"
For this build, most of the major components were removed from its original case and remounted into a new custom case. This was necessary to accommodate the addition of new components onto one end.
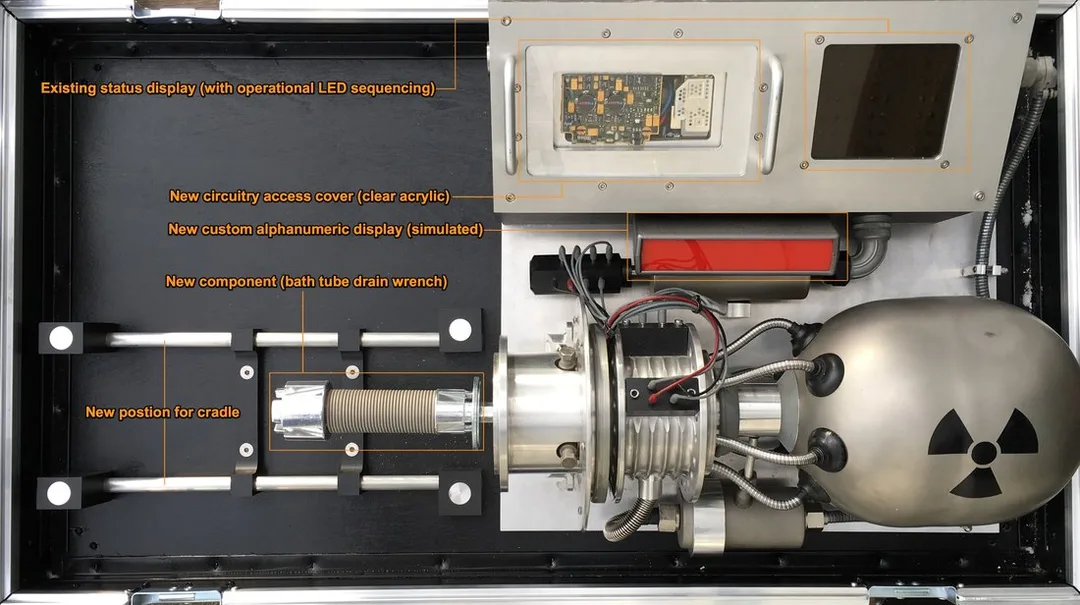
Gone however, was the existing the LED countdown timer and circuitry access cover. The former was replaced with a custom built, simulated, alphanumeric display. This new display continuously flashed the caption "STANDBY".
The original circuitry access cover was replaced by a new version made from clear acrylic to make the interesting contents visible. Later, the Prop Department would add some custom graphics to a couple of circuit components. This was apparently relevant to some story element.
Significantly, there would be two new components mounted onto the left of the main assembly. The first (depicted below) was a cast aluminum bath tub drain wrench, that integrated nicely with the existing design
To add texture, a short piece of dishwasher drain house was fitted over the shaft of the wrench. The finishing touch, would be another complex aluminum component that would fit around the former (more on that later).

The "Nuclear Trigger"
2nd Device: the "Nuclear Bomb"
The second device was scripted to be assembled onto the first device to form a complete "nuclear bomb". The "seed-object" selected for this purpose, came from another vendor's rental stock (Phoenix 1 International). It featured a control panel with operational indicators that would be used in the final configuration.
Omitted however, was an usable patch panel component, as well as its original case. This process was conducted with some care, as everything would have to be restored to its original condition prior to being returned to the rental house.
Omitted however, was an usable patch panel component, as well as its original case. This process was conducted with some care, as everything would have to be restored to its original condition prior to being returned to the rental house.
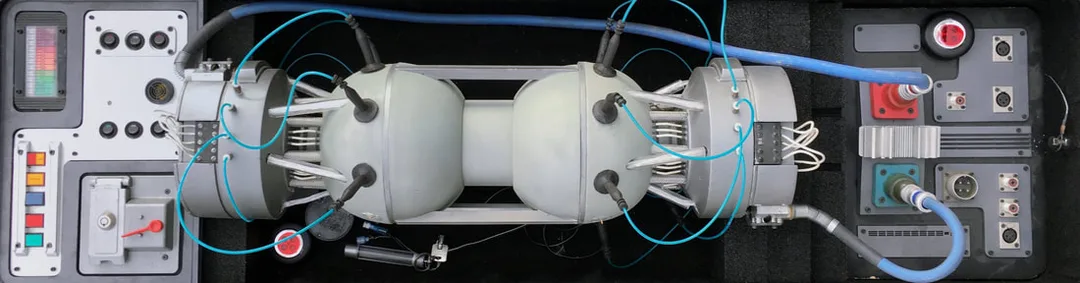

The 2nd "Seed-Object"... a rental "nuke" from PHOENIX 1 INTERNATIONAL
The Design Process
The fabrication of some custom components would be required to marry the two devices together mechanically. Prior to that though, a number of images depicting various possible component configurations were submitted to Production.
Depicted below, was the approved version. Upon approval, a frame component and bomb cradle could be designed and built. The control panel (jury-rigged into position in the photo) would require that a suitable housing be designed and built to allow the desired placement.
Depicted below, was the approved version. Upon approval, a frame component and bomb cradle could be designed and built. The control panel (jury-rigged into position in the photo) would require that a suitable housing be designed and built to allow the desired placement.
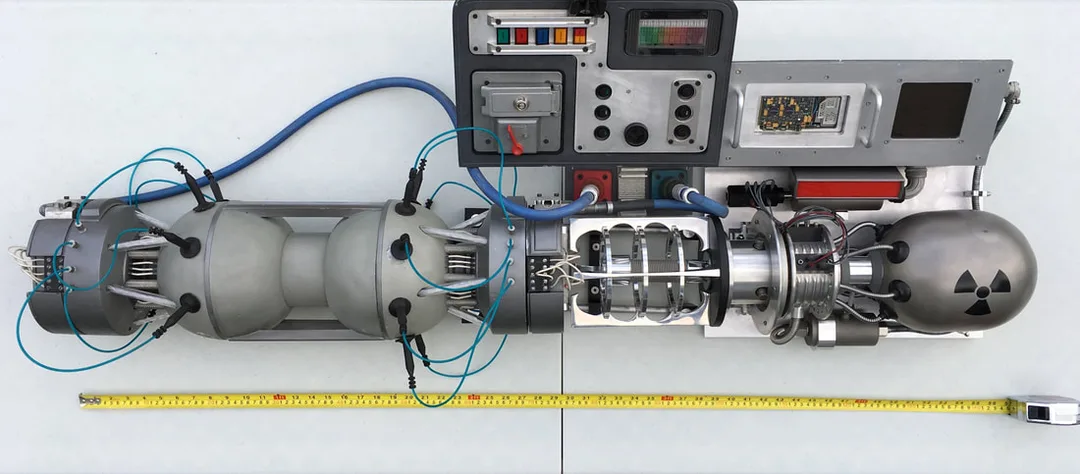
Approved Configuration
One of the new components added to the "Trigger Device", ended up being well suited to marrying the two props together. Interestingly, this particular item was provided by ARROW'S Prop Master Ken Hawryliw, and had special significance to him.
It was the prop "Alien Propulsion Unit" he had built for the TV series X-FILES... a show Ken had been Prop Master on for the entire run. Needless to say, special care was taken to ensure that this precious item would be returned in good condition, once the "nuke" had been wrapped (see below).
It was the prop "Alien Propulsion Unit" he had built for the TV series X-FILES... a show Ken had been Prop Master on for the entire run. Needless to say, special care was taken to ensure that this precious item would be returned in good condition, once the "nuke" had been wrapped (see below).
The "Alien Propulsion Unit" from the X-FILES
Construction Process
Most of the fabrication work would involve the custom frame, and a suitable wheeled cart that would carry the entire device. The frame was made from 1/4" sheet aluminum that featured a hexagonal pattern of "lightening-holes".
These were made via a water-jet cutter. In each corner, there was a 1/2" diameter hole. These would later engage tapered pins being installed onto the top corners of the transport cart. This would essentially "lock" the frame to the cart.
These were made via a water-jet cutter. In each corner, there was a 1/2" diameter hole. These would later engage tapered pins being installed onto the top corners of the transport cart. This would essentially "lock" the frame to the cart.
Nuclear Device Carrier Top Panel
The transport cart was designed by PROPOLOGY, but due to time constraints, was ultimately built by the ARROW Construction Department. It was made from square aluminium tubing, and was welded together (see below).

Nuclear Device Transport Cart
The plans for the control panel housing and pedestal are shown below. This would also house the necessary DC power supply for the control panel indicators.
Nuclear Device Control Panel Housing & Pedestal
Component Origins
Here's a complete breakdown of the components used:
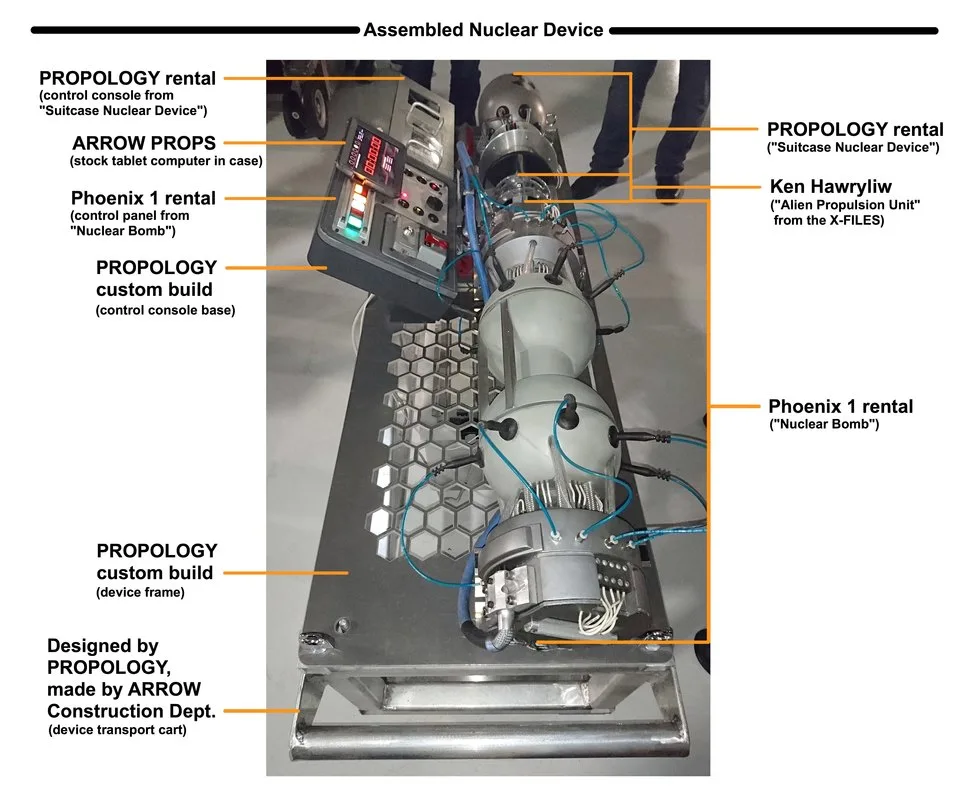
Breakdown of the Completed Device
A good example of how stock rental items can integrated to create a novel outcome. A great deal of production value realized... at low cost.
0 Comments