Remote Manipulator Arm
from the TV series SMALLVILLE ("Legacy")
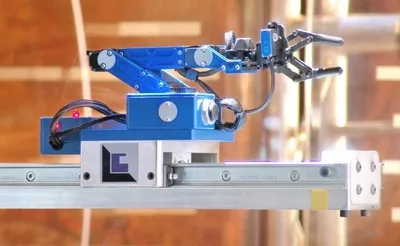
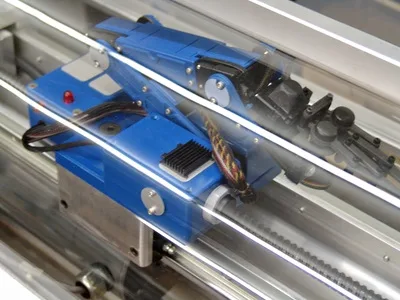
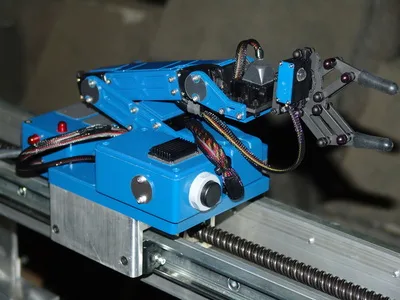
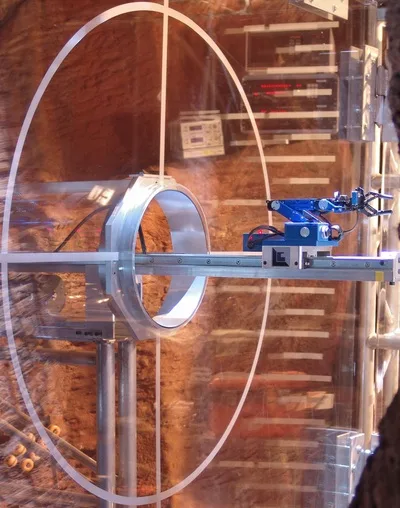
This is how it looked on the day. The arm had 6 points of articulation and was mounted on a linear drive unit that provided locomotion.
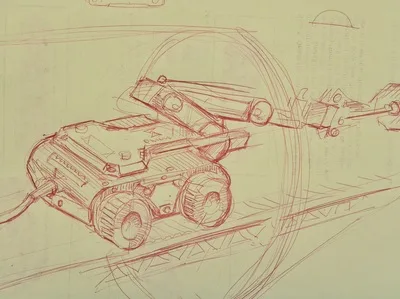
This is the original thumbnail sketch made, based upon notes from production.
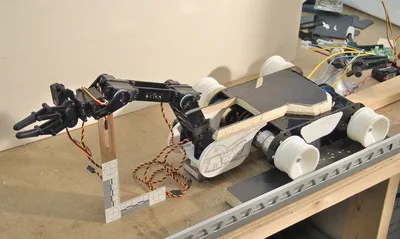
Originally, it was to be a self-contained, wheeled-platform, with a robotic arm mounted on top.
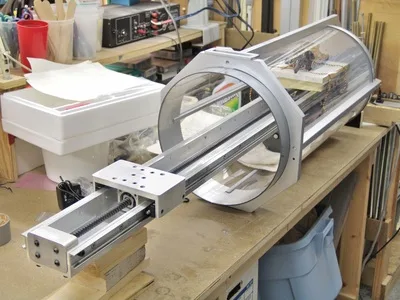
The wheeled platform was quickly abandoned in favour of a linear drive unit. It's shown here being test-fitted into the acrylic tube that construction had provided.

There were misgivings about using a wheeled platform because it intrinsically lacked the precision required for predictable/repeatable, moves so Steve Genser of Robotic Effects was contacted, who provided a linear drive unit he had on hand.
This is the first time the arm was fitted to the linear drive. Steve didn't have a controller on hand for it, so he directed us to Jordan Kidston of OBJECTS who kindly provided us with one.
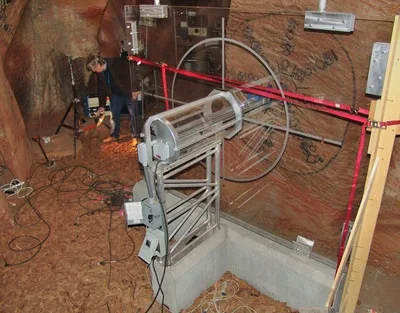
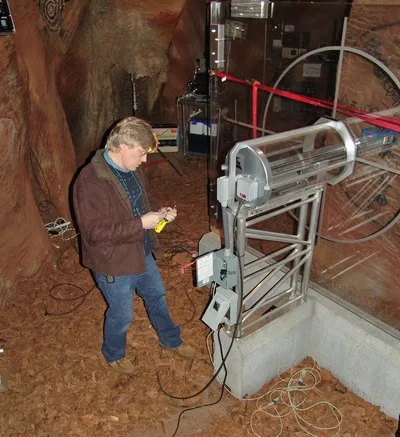
The night before it played, we were busy initialling the unit, and its control devices, in the fabulous Kawatchie Cave set.
Here's the little guy... his first time on set!
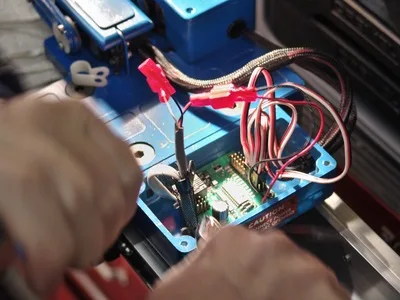
Here we're tying in the power and control cables to the arm.
This shot shows Bob connecting power and control lines to the linear drive.
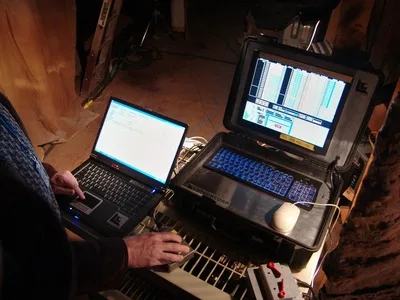
This depicts shooting day. The computer on the left is controlling the arm, while the other runs the linear drive. The box in the foreground with the red levers is the emergency power disconnect to the rig.
Ready for take one!
Project Notes
The project was a co-produced with the SMALLVILLE construction department. They provided the aluminium and acrylic stand/enclosure assembly that our robotic arm rig was to be attached to (as well as and a large acrylic protective shield). The prop department furnished us with a couple of hobbyist's robotic kits that they considered a viable basis for this project.
It was our assignment to build these kits and cosmetically "dress" them to make them seem like an authentic industrial robot. As well, the completed assembly had to be able to insert a "Kryptonian key" into a recess feature in the SMALLVILLE "Kawachie Cave" set.
We were a little skeptical that this gear would be able to provide the smooth, accurate, programmed moves that were required. Unfortunately, given budget constraints, use of industrial-grade, or completely custom-built solutions were considered out of reach.
Shortly into the project, the wheeled platform was abandoned in favour of a rented industrial-grade, linear servo. It was much better suited to providing precise and repeatable locomotion to the arm, and was a terrific cosmetic improvement.

LYNXMOTION - Lynx 6 robotic arm with motorized 4-wheel platform

Kryptonian Key

Recess in cave wall
Modifications to the robotic arm kit:

(click on image to enlarge)
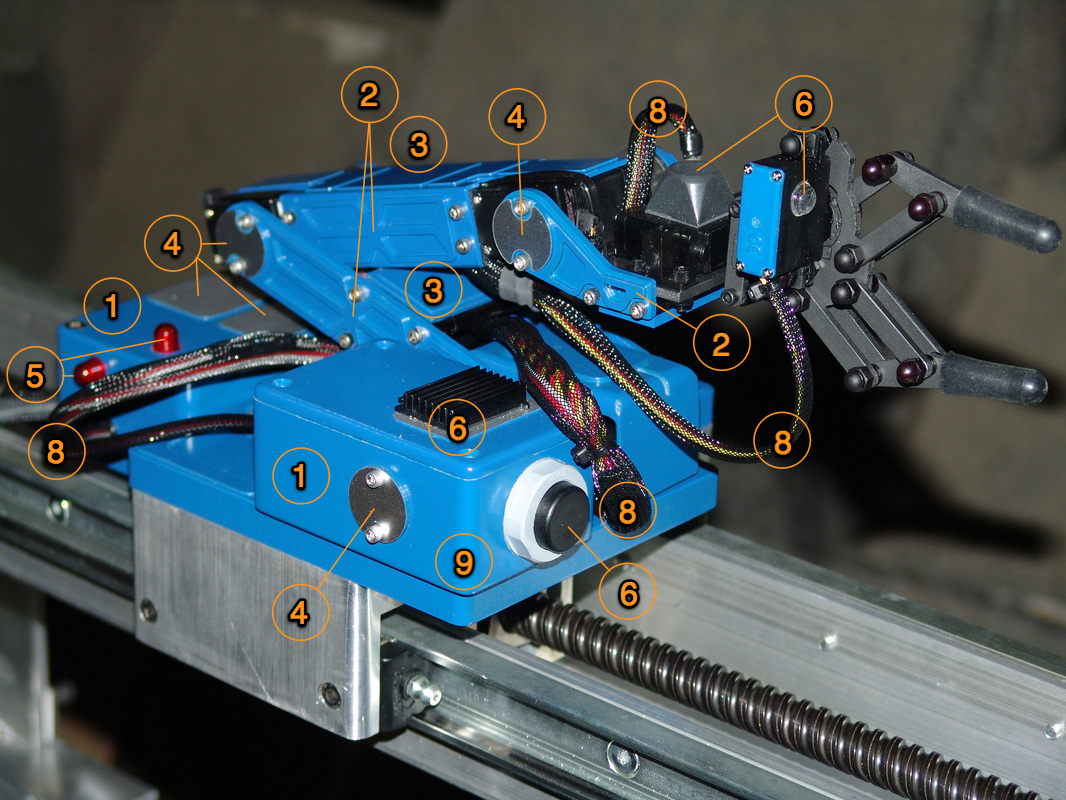
1. Addition of 2 stock ABS plastic electronic enclosures to house the control circuit board and conceal the outboard hobby servo at the the base of the arm.
2. Application of laser-cut plastic structural details, that when applied, gave the impression that the arm components were more substantive than the plastic sheet they were actually made from (emulating the look like machined metal).
3. Installation of 4 laser-cut plastic covers to enclose the upper and lower arm assemblies.
4. Application of various laser-cut detail pieces made from simulated, brushed stainless steel plastic sheet (again, intended to convey the idea that arm structure was made from metal).
5. Installation of 4 flashing "hazard-lights" (LEDs in incandescent indicator housings) that were activated whenever the robot was in use.
6. Application of various other detail items such as a black anodized aluminium heat sink (top of the servo housing) a fake emergency "kill switch" (front of the servo housing), a clear, self-adhesive rubber foot (front of the "end-effector" servo) to simulate an IR sensor, etc…
7. Replacement of the kit's black hex-socket screws with stainless steel versions.
8. Installation of black cable sheathing to cover the kits's multicoloured wiring.
9. Application of blue paint (from the SMALLVILLE color pallet) to all the major components.
As a finishing touch, we applied a pair of art department provided "LUTHERCORP" decals to either side the linear drive component the robotic arm was attached to.
This project was fairly challenging to accomplish given the short turnaround and tight budget constraints.
That said, this is a good example of how the application of cosmetic components can really enhance
the appearance of an inexpensive, stock item.
That said, this is a good example of how the application of cosmetic components can really enhance
the appearance of an inexpensive, stock item.